
on A Complete Guide to Propagating Walnut Trees from Seed
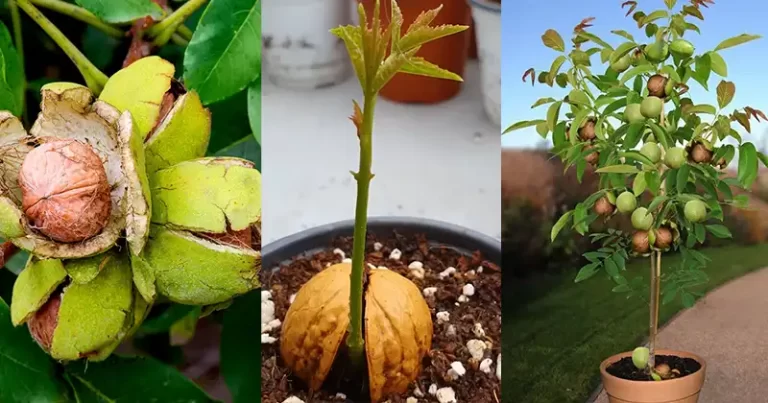
Walnut trees are famous for their delicious nuts and their fine, elegant wood. Growing a walnut tree from seed can be a rewarding and environmentally friendly endeavor. This comprehensive guide provides a step-by-step approach to help you grow a walnut tree from seed. It covers various germination techniques and offers essential information to ensure the success and health of your walnut tree. Step 1: Assemble Your Supplies Before you begin the process, make sure you have the following materials on hand: Walnut seeds (harvested from mature walnuts) A pot or tray for planting Quality potting soil Plastic wrap or a plastic bag A sunny location or grow light Watering can or spray bottle Pruning shears (for later steps) Step 2: Select Seeds Select sturdy, mature walnut seeds. These can be obtained from the wild, purchased online, or collected from a mature walnut tree. Make sure the seeds are fully developed, plump, and free of any damage or mold. Step 3: Germination Methods There are several different methods for germinating walnut seeds. Here are three common approaches: Method 1: Cold Stratification Fill a container with potting soil, leaving an inch of space at the top. Plant the walnut seed about an inch deep. Moisturize the soil, making sure it is moist but not saturated. Cover the container with plastic wrap or place it in a plastic bag. Refrigerate the container for 8 to 12 weeks, mimicking winter conditions. After the stratification period, move the container to a sunny location or use a grow light. Method 2: Soak and Plant Soak the walnut seeds in water for 24 to 48 hours to soften the outer shell. Plant the seeds about an inch deep in a container filled with potting soil. Moisten the soil, but avoid making it soggy. Place the container in a sunny location or use a grow light. Method 3: Fall Planting In the fall, plant the walnut seeds directly into the soil where you want your tree to grow. Dig a hole about two inches deep and place the seed inside. Cover it with soil and mark the spot. Wait until spring and the walnut tree will begin to emerge. Step 4: Care and Maintenance Regardless of the germination method chosen, caring for walnut plants requires proper care:Maintain consistently moist soil, avoiding waterlogging. Provide 6 to 8 hours of sunlight or adequate exposure to grow light daily. Transplant seedlings into a larger container or preferred outdoor location when they reach 4 to 6 inches tall. Protect young trees from pests and animals with fencing or netting. Prune out any dead or diseased branches as the tree matures. Fertilize the tree regularly with a balanced, slow-release fertilizer. Step 5: Transplanting Outdoors When your walnut tree is about 2 to 3 years old and about 3 to 4 feet tall, it is time to transplant it to its permanent outdoor location. Follow these steps: Choose a sunny location with well-drained soil. Dig a hole twice as wide as the root ball and of a similar depth. Carefully remove the tree from its container, avoiding disturbing the roots. Place the tree in the hole, ensuring the top of the root ball is level with the soil surface. Fill the hole with soil, gently packing it down as you go. Water the tree thoroughly to settle the soil. Conclusion: Growing a walnut tree from seed is a rewarding and environmentally friendly activity. By adhering to these guidelines and selecting the germination method that works best for you, you can nurture a walnut tree that will provide shade, exquisite wood, and delicious nuts for generations to come. With patience and proper care, watch your walnut tree flourish and become a splendid and abundant addition to your garden or landscape.