
On Begonias, how to propagate branches to infinity with 1 banana: it multiplies instantly
In this article, we’ll show you a very practical and simple method for growing lush begonias, both in pots and in the garden. Here’s how to best propagate branches using a banana.
Begonias are very popular and beloved by many people. There are several varieties of this plant. In fact, it can be found both indoors and on balconies or in the garden. Begonias come in several colors: red, pink, yellow, orange, and white.
Begonia can be grown both in pots and in the garden . The important thing, however, is always to respect the characteristics and needs of this beautiful plant. In fact, it likes mild temperatures , while it could suffer in extreme conditions, due to excessive heat or frost. Even drastic and sudden changes in temperature are not at all well received by begonia.
As with many plants, it is therefore advisable to water the begonia constantly, especially during the warmer months. The soil must always be moist , but stagnant water must be absolutely avoided. Both in pots and in the garden, it will therefore be essential that the soil has excellent drainage capacity, in order to avoid the risk of drying out and root rot.
In this article, we want to draw the reader’s attention to an extraordinary technique for infinite propagation of begonia branches . It may seem strange, but for the perfect success of the operations a simple banana will be very useful. Let’s discover all the details of this amazing method for obtaining truly lush begonias in a short time.
Begonias propagated endlessly – here’s the banana method
Begonias, in addition to being irrigated frequently, do not need to be placed in direct contact with the sun’s rays , especially during the hottest hours of the day. Therefore, it will be advisable to grow them in partially shaded areas , provided that light is present, since they like good exposure to this element.
Begonias
Additionally, this plant should be pruned if dead or wilted leaves are noticed, so that it can proliferate as best as possible. When growing in pots, begonias need a good-sized pot and soil that is very rich in nitrogen . Watering should be done at least once every 2 days. Much, however, will depend on the season and the dryness of the soil.
Begonias love humidity, but absolutely dislike stagnant water. A fair compromise in this regard is therefore ideal.
With these premises in mind, let’s move on to the main point of our article. Here’s how to propagate begonia branches in a very simple way using a common banana tree .
The propagation technique
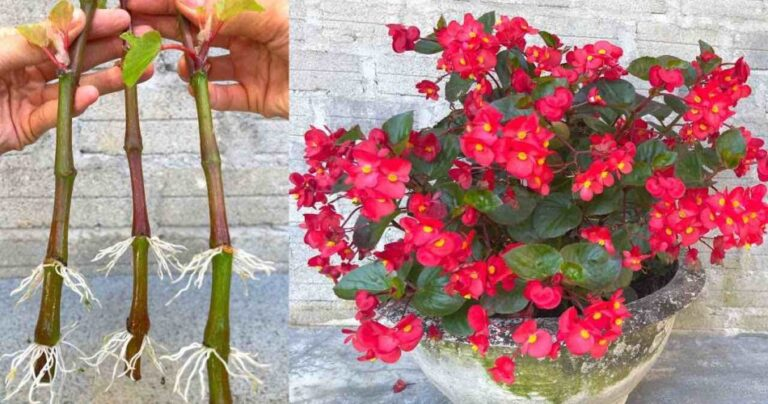
The first thing you’ll need to do is take a few begonia branches and trim the now-dry leaves. Once that’s done, all you need to do is get a banana and try out a truly amazing technique. You’ll cut the banana in half and insert all the branches you want to propagate into it .
Lush Begonia Banana Method
Each branch should penetrate the banana and soak up the pulp of this fruit . Banana, in fact, is an excellent natural fertilizer and is rich in potassium, calcium, magnesium and many other nutrients for plants.
Now immerse the branches soaked in banana pulp in a glass or container containing water. At this point, simply place the glass with the branches in a dark place and wait at least 15 days .
After this period, you will notice that the flower stem has already begun to take root . You can then remove the individual branches from the pot and proceed to grow them inside a pot . As mentioned earlier, it must be of a good size, so as not to limit the growth of the plant in the future. It will then be necessary to choose a soil suitable for growing begonias.
Once you have inserted the twigs into the vase, you will need to water them abundantly . If you take good care of this aspect in the following months, you will have healthy and very lush begonias already after a few months. A very simple propagation technique and within everyone’s reach.
After about 90 days , in fact, the plant will already have a good size and a huge number of flowers will have bloomed . As you can see, this technique can be carried out in a few simple steps even by those who are not too expert in gardening.