
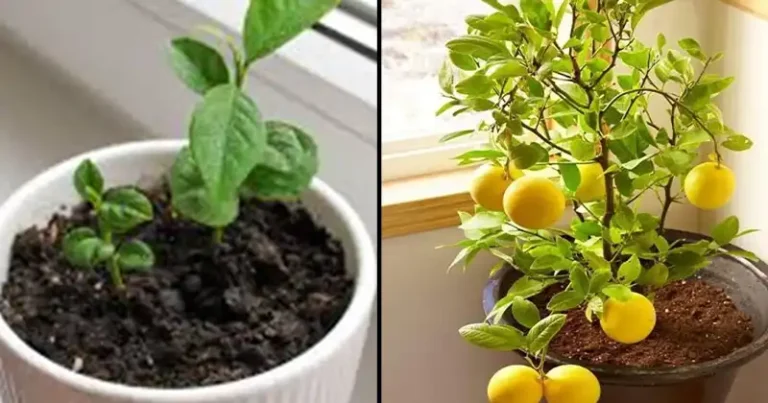
Growing your own lemon tree in a pot from cuttings is a rewarding and cost-effective way to enjoy the tangy freshness of homegrown lemons. Not only does it save you the hassle of buying seeds or young plants, but it also gives you control over the quality and variety of lemons you produce. In this step-by-step guide, we’ll show you how to propagate a lemon tree from cuttings, taking them from a healthy lemon tree and encouraging them to develop roots in water before transplanting them into pots. With a little patience and care, you can have your own thriving lemon tree in no time. Equipment you’ll need:
Pruning shearsHealthy lemon tree (source of cuttings)Glass or potClean, distilled waterRooting hormone (optional)Pots with drainage holesPotting mix (specially formulated for citrus)Plastic bags or plastic wrapRubber bands or plant tiesA sunny location or grow lights
Step 1: Choose Your Lemon Tree Cuttings To begin, select healthy branches or stems from your established lemon tree. It’s best to take cuttings from the softwood, which is the newest growth, as it has a higher success rate in developing roots. These cuttings should be about 4 to 6 inches long and include a few leaves. Make sure to cut just below a node (the small bump where the leaves or branches emerge), as this is where the roots will develop. Step 2: Prepare the Cuttings Remove the leaves from the bottom two-thirds of the cuttings, leaving a few leaves at the top. This will help direct energy toward root development. If you prefer, you can dip the cut end of the stem in rooting hormone to enhance the rooting process. While this step is optional, it can increase your success rate. Step 3: Root the Cuttings in Water Place your prepared lemon tree cuttings in a glass or jar with distilled water. Make sure at least two nodes (where the leaves used to be) are submerged in the water. Change the water every few days to keep it fresh. This step typically takes 2 to 6 weeks for roots to form. Step 4: Transplanting into Pots Once your cuttings have developed a few inches of roots, it’s time to transplant them into pots. Select pots that are at least 6 to 8 inches in diameter with proper drainage holes. Fill them with a well-draining potting mix formulated for citrus trees. Step 5: Transplanting Your Cuttings Carefully remove the cuttings from the water, taking care not to damage the delicate roots. Plant each cutting in its pot, making sure the roots are covered with soil and the top leaves are above the surface. Water the newly planted cuttings thoroughly. Step 6: Provide Optimal Conditions Place your potted lemon tree cuttings in a sunny location, preferably receiving 8 to 12 hours of sunlight per day. If sunlight is limited, consider using grow lights as a supplement. Keep the soil consistently moist but not waterlogged. You can use a plastic bag or plastic wrap to create a mini greenhouse effect, which will help maintain humidity around the cuttings. Secure the bag or wrap it with rubber bands or plant ties. Step 7: Monitor Growth and CareKeep a close eye on your lemon tree cuttings as they continue to grow. As the roots establish and the plant grows, you can gradually remove the plastic covering. Ensure the soil remains consistently moist but not waterlogged, and feed your young lemon tree with a balanced citrus fertilizer according to the package instructions. Bottom Line: Growing a lemon tree from cuttings is a rewarding journey that can yield delicious rewards. With the proper care and attention, you can enjoy the satisfaction of cultivating your own citrus fruit. Whether it’s adding zest to your culinary creations or brightening up your living space with its vibrant foliage, your potted lemon tree will become a delicious addition to your home. So get started, and in no time, you’ll be harvesting home-grown lemons to brighten your day. Happy gardening!