
From Leftovers to Greens: Growing Bok Choy at Home in Recycled Plastic Bottles
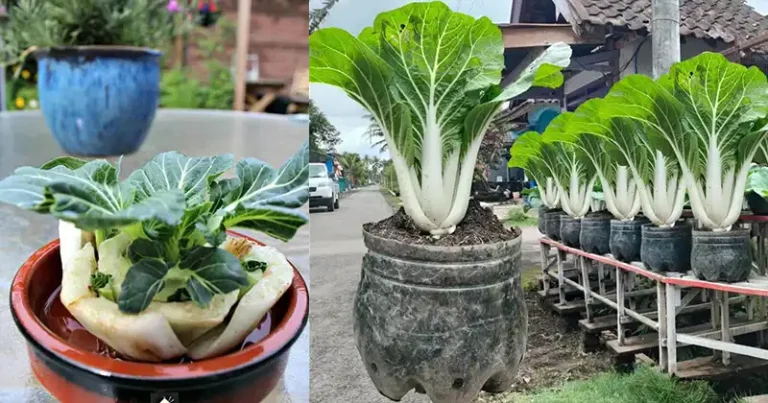
In today’s world of sustainability and eco-friendly living, regrowing vegetables from kitchen scraps has become an increasingly popular trend. Among these renewable kitchen scraps is bok choy, a versatile and nutritious leafy green that is a staple in many kitchens. In this article, we’ll guide you through the process of growing bok choy at home using a two-step method: first, sprouting it in water, then transplanting it into recycled 5-liter plastic bottles filled with soil. Not only is this approach environmentally friendly, but it’s also an exciting project for beginners looking to explore the world of gardening. Section 1: Sprouting Bok Choy in Water Why Water? Growing bok choy in water is a great place to start, as it makes it easy to observe the early stages of growth and ensures faster root development. Select your scraps: Start by choosing a fresh bok choy base with the roots still intact. Cut it about an inch or two above the root end. Prepare a container: Find a glass or jar and fill it with about an inch of water. Make sure the cut end of the bok choy scraps is submerged while the leafy part remains above the waterline. Placement and lighting: Place the container in a spot with indirect sunlight. This will encourage root development. Change the water every few days to keep it fresh. Root development: Within a few days to a few weeks, you will observe roots beginning to form from the base of the bok choy scraps. Section 2: Transplanting into recycled plastic bottles Why recycled plastic bottles? Transplanting your bok choy scraps into recycled plastic bottles is an eco-friendly way to provide them with a stable growing environment. These bottles are readily available, and this method allows for more controlled conditions compared to planting directly in the ground. Prepare the bottles: Clean and disinfect 5-liter plastic bottles. Cut off the top third, leaving the bottom portion as a planting pot. Soil preparation: Fill the bottom portion of the bottle with quality potting soil, leaving some space at the top for planting. Transplanting: Dig a small hole in the soil and insert the bok choy scraps, ensuring the roots are well covered with soil. Water the soil thoroughly after planting. Mini Greenhouse: Place the top of the bottle (without the cap) on top of the bottom to create a mini greenhouse, promoting humidity and protecting your young plants. Section 3: Care and Maintenance
Water your bok choy in plastic bottles regularly, keeping the soil consistently moist but not waterlogged. Make sure the containers receive indirect sunlight and maintain good air circulation to prevent mold growth. After about 4 to 6 weeks, your bok choy should be ready to harvest. Start with the outer leaves, allowing the inner leaves to continue growing.
Bottom Line: Growing bok choy at home from kitchen scraps is not only environmentally friendly, but it’s also a great way to have a steady supply of fresh, nutritious greens. This two-step method, starting with water and then transplanting into recycled plastic bottles, makes the process accessible to beginners and yields delicious results. Enjoy the opportunity to connect with your food, reduce waste, and savor the satisfaction of homegrown bok choy.