
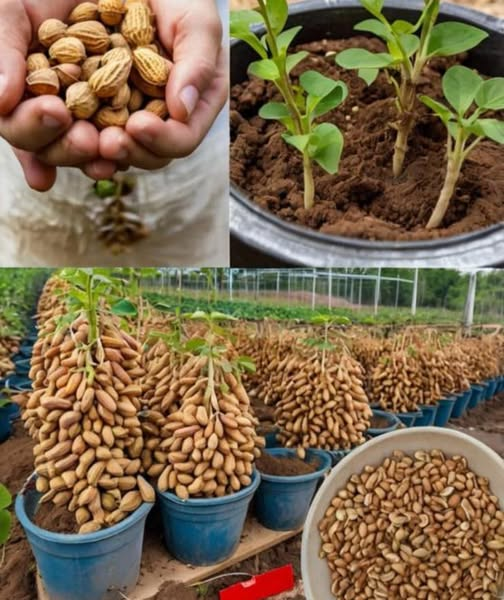
Peanuts, also known as groundnuts, are a nutritious and versatile food that can be easily grown at home. You don’t need a large plot of land to have your own peanut plant; with a little ingenuity and some recycled plastic containers, you can grow this legume in your own home.
This article will teach you how to do it step by step, from preparing the containers to harvesting. It’s a great way to recycle and enjoy fresh, organic peanuts!
Index
- How to Grow Peanuts at Home in Recycled Plastic Containers: Complete Beginner’s Guide
- Tips and Tricks
How to Grow Peanuts at Home in Recycled Plastic Containers: Complete Beginner’s Guide
Growing peanuts at home is easier than it seems. Follow this complete guide to start your own crop in recycled plastic containers.
Materials Needed:
Raw (unroasted) peanut seeds
Recycled plastic containers (such as bottles, drums or plastic pots)
Fertile soil or substrate for plants
Sand to improve drainage
Organic fertilizer
Watering can or spray bottle
Step 1: Choose and Prepare Containers
Choose recycled plastic containers that are at least 30 cm deep to allow the peanut roots to develop.
Make holes in the bottom of the containers to ensure good drainage.
Wash containers thoroughly before use to remove any residue that could harm plants.
Step 2: Prepare the Substrate
Mix fertile soil with sand in a ratio of 70% soil and 30% sand. This will ensure good drainage and prevent the roots from rotting.
Add a little organic fertilizer to enrich the substrate.
Step 3: Plant the Peanut Seeds
Place the raw peanut seeds at a depth of 5 cm in the substrate, leaving a space of 10 cm between each seed.
Cover the seeds with a thin layer of soil and water gently with a watering can or spray bottle.
Place the containers in a warm, sunny location, as peanuts need at least 6 hours of direct sunlight a day.
Step 4: Care During Growth
Water the plants regularly, keeping the substrate moist but not waterlogged.
As your plants grow, be sure to remove weeds that may compete for nutrients.
If the climate is very dry, consider covering the soil with a layer of mulch to retain moisture.
Step 5: Harvesting the Peanuts
Peanuts will be ready to harvest approximately 120-150 days after planting.
You’ll know it’s time to harvest when the leaves start to turn yellow.
To harvest, simply carefully dig up the plant and shake the soil off the roots.
Let the peanuts dry for a few days before storing or consuming them.
We recommend: From seed to spice: How to grow saffron at home – The most expensive spice in the world
Tips and Tricks
Additional Containers: If you don’t have large containers, you can also use reusable grow bags.
Natural fertilizers: Use compost or well-rotted manure to enrich the substrate.
Crop rotation: Avoid planting peanuts in the same substrate more than once a year to prevent diseases.
Pest protection: If you detect pests, use natural solutions such as garlic infusions or potassium soap to control them.
With this guide, growing peanuts at home is a fun, sustainable and productive activity. Go ahead and try it and enjoy homemade peanuts grown by yourself!